Showing posts with label ornamental plaster. Show all posts

Saturday, July 24, 2010

Harris Pargework Ceiling


Harris county Courthouse Pargework Ceiling
Old Historic ceiling
Last year I told you about this ceiling at the Harris County courthouse.
( See blog) Hard to believe it was over a year ago. We have now made molds of the elements, cast all the items needed to recreate the ceiling and installed the pieces. The ceiling was framed in and plastered, and finished in a slick white coat finish by Golden West Plastering of Houston Texas. They did an exceptional job. We typically like to control all the plastering as it is hard to find plasterers that understand how to plaster a ceiling that is flat and true to plane, any imperfections will make it tough to install the pieces but in this case the work was perfect.

In this photo we have laid out control lines to install all the pieces to. It is extremely important to flow the lines as any deviation will show up as you look down the ceiling.
After checking the layout and making sure all the electrical devices as well as the fire sprinklers will fit into the pattern correctly we start installing the pieces. After installing all the pieces we will “tool up” the joints and make the joint lines disappear. Tedious and slow work for sure. blue lines are the centers of the elements the red lines are the edges of the corners in the quadrennial. We then labeled the elements to insure we alternated the elements.


The crown mold and frieze that runs along the wall both have a pattern in them that requires us to start from one direction and make all the cuts correctly to keep the pattern flowing all around the ceiling. Tougher than it looks but it  makes a big difference. We started out from the only original piece left in the room and kept the pattern flowing. The trick is to find the most inconspicuous place to hide this. The old way was to find a door the opens against a corner of the room and hide the joint there. That way as you enter the room you would have to turn all the way around to see the miss pattered joint.  However we had to start from the historic piece and continue around the room and end up on the other side of the historic piece. I challenge you to find the bad joint. (I know where it is but as of yet no one else has been able to find it)

Our decorative painters have also started painting the ceiling. It also is a very labor intensive painting project. It has two colors on the ceiling a yellow ceiling paint and a glazed painted surface on the ornamentation. Glazes tend to show all the imperfections in the plaster but luckily none showed up.
So here is the completed mockup area . Now that we have complete acceptance of the paint procedure we can finish the paint. We will be doing so in the next two weeks.


Finished ceiling


Tuesday, January 19, 2010

Man that is one Huge Capital


Above is a photo of one of the existing capitals on the Harris County Courthouse.The are at the top of the center rotunda  There are four of them and all of the centers of the capitals have been removed in the past. We were contracted to recreate the center element.

We first created a rubber mold of the largest remaining parts. We then cast parts those parts in our shop and installed them into a frame to start building the complete capital.

We measured the distances between the decorative elements so that we built it holding the same size as what was on site. We built it laying down to so that carving would be easer.


Here is the where we started the building of the mockup. you can see on each side is plaster castings that came out of the molds we made so that the replicate the sides. the top ledge is the top run shelf on the existing captals. We installe wood framing and lathed over the wood so we could plaster in as have the starting shape.


Here I"m plastering over the lath and framing creating the trunk shape of the capital.


We installed leaves that were also cast from molds made on site to start the shaft of the capital. We then installed framing and then lathed it and plastered as we did the vertical trunk of the capital. After all of this we now has the basic shape started and could start building the elements.


Here I have started the large center element. I started this first so that I had a feel for the scale.
After thisIi started filling in the leaves.

The completed capital can be viewed here.

Hundreds of hours have been put into this project. once approval is received we will make a rubber mold of the capital and start casting the four capitals. ship them to the sight and install. I will have post additional photos on the installation in the future.

Friday, December 25, 2009

New Project!!!!


Professio by Matt Henson, Inc. is pleased to announce that we have started work on the precious Hipolito F. Garcia Federal building and U.S. courthouse located directly across the street from the Alamo in San Antonio Texas. We are proud to be a part of the team that The Beck Group put together for the restoration of this stately building.  We are responsible for protecting and restoring the historically significant interior portions of the building including the ornamental plaster, flat plaster, decorative paint finishes and protecting the large Howard Cook fresco mural in the entry lobby. See the photo.

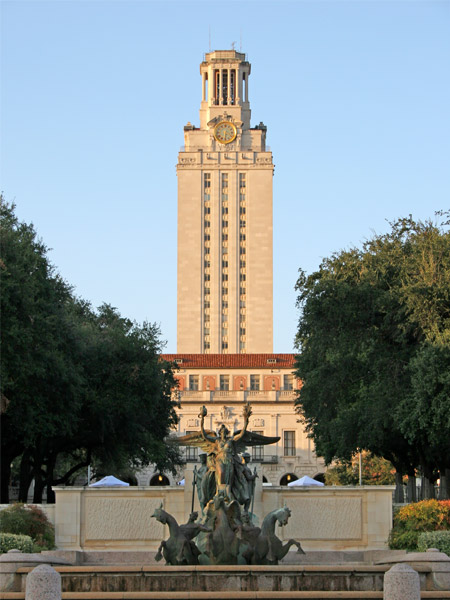
One of our first tasks is to do an analysis of the original paint finishes. This will require careful removal of the paint to expose the first layer without damaging the surface of the subsequent layers of paint, thus giving us the opportunity to color match the paint that will be applied to these areas. It never ceases to amaze me that when all the original colors are put back into their places, these old buildings just seem to come back to life. All the elements from the chandeliers to the mechanical grill covers to the tile floors will once again work in concert to bring back to life the genius of designers Ralph Cameron and Paul Cret. Paul Cret is best known in Texas as the designer of the Main building and Tower on the University of Texas campus in Austin Texas.

Another part of our contract is protecting the mural. This mural is one of the largest frescoes in the United States. It can be easily damaged by dust created during reconstruction. Most of the dust around job sites come from cutting and sanding. Most of the surfaces are alkaline such as concrete, masonry mortars, plaster, drywall and drywall mud. We have to install protection over the mural to insure that these elements will never come in contact with the fragile paint surface. The protection will also have to be installed in such a way that it will not damage the surface. Delicate work with lots of precautions. Extra levels of caution are in order here and we will have professional conservators inspecting and advising on the work through the process.

Next we will need to devise a plan to cut into the existing plaster finishes to provide access to run new electrical systems, fire alarms, and fire sprinkler piping. We will be researching the framing and structural elements and develop a plan that will minimize the destruction of historic fabric and prevent causing additional damage. A lot of restoration projects fail to do this and disaster happens. Without due diligence, a structural ceiling could fail resulting in a loss of historically significant elements as well as risking the lives of workers below.

As you can see, it takes a lot of preplanning and looking at all the possibilities of failure and providing safeguards to create a environment where we are reasonably comfortable that, beyond an acute catastrophe, the building will be safe from any additional harm.

We will keep you informed on our process including photos if the GSA will let us.

Wednesday, December 9, 2009

Crown of the Capital


Harris county courthouse continues. Even though we here at Professio have lots of projects going on, we are still hard at work getting all the ornamental plaster pieces ready for installation. Here I’m carving the very top of the large capital that will set high up in the rotunda.  I’m carving it out of clay and the design comes from other elements found in the courtroom. Notice the leaves are very deep. This unit will be located some 30 pluse feet from the first level you can view it from. And it will needs to be deep so that the designs can stand out from that distance.

After finishing the carving we will make a rubber mold of the element and then cast the four pieces out of gypsum plaster. Installation is scheduled to start soon and unfortunately the large capital may be the very first piece we are to start on. So the presser is on to get this piece and the large capital carved and into production.

I will update you again as we make the mold of this peace

Thursday, October 29, 2009

"Man That is One Big Capital!!"


We continue to work on the Large capital that graces the top of the atrium on the Harris County Courthouse. Here I’m carving out the large “Shield” that is in the center. The scale is so large that it makes it difficult to build up the depth that I need. In the back ground you can see the drawing that my son Matt2 produced and which has been approved by the Susan with Architexas the architect and the Texas Historical Commission.
This shield is very Sulivanistic in style and you can see the influence of Luis Sullivan on the original designer. Sullivan loved to use what he called stretched fabric complete with ripples. On either side of the shield we will need to carve very deep and intricate leaves. Sullivan loved to make his designs come alive and used nature in very intricate detail to create this.
We also still have to create the top cresting. That cresting will extend another 14 inches up above the top of capital and protrude another 8 inches out toward the center of the room. This will allow the crest to be seen from the ground or in this case the 2nd floor which will be at least 50 feet below the capital.
I realized something yesterday. I will have spent some 80 pulse hours carving the missing area on the capitals.  I have already spent 40 hours creating the side molds of the existing pieces. The shop spent 20 or more hours casting the existing pieces and building the mockup form. Matt 2 my son spent 20 hours creating the drawings and getting them approved.  I will spend at least 30 plus house creating the rubber mold.  All of that work to cast only 4 capitals. Then after this project is complete we will start destroying the mold and the mockup.  That is 110 hrs of time on something that will ultimately be worthless. There is just no way anything this large will ever be used again and it takes up way too much space to save. It is a little disconcerting but I guess the whole object is to recreate the missing capitals. 

Wednesday, October 21, 2009

Robert’s County Courthouse Mockup


In an effort to help visualize the area where the entablature will occupy on the Roberts County courthouse we built a small wall and ceiling to represent the area. The drywall represents the plaster wall surface. The ceiling rises off the wall at a 70% angle and the missing area is the area we need to recreate the ornamental work. The size of the area missing came from a report that was compiled by Johnny Langer of Source Historical. Just to remind you the area in question has been totally lost except for a few small pieces that we are using to try and figure out what was there. (see Roberts county courthouse, and look these pieces fit together)


We installed the bead and read molding we recreated alone the top ceiling edge and the bottom wall edge. We also hung loosely the fascist leaf band along the top against the bead and read. We know the bead runs along the bottom of the entablature because parts of it are still attached on site. The top area is surmised because we have a piece of the fascist band that is attached to a bead and read and has been cut on a 45% angle that could only mean that it was attached to the ceiling. The angle could not have been used along the wall unless the band somehow turned and went up the wall which there is no change in heights in this courtroom and thus no way that would have been done.

But we still have a large area in which to fill in. Matt2, my son and president of Professio, came up with the idea that they might have run the fascist band along the bottom also so we hung a piece there running in the opposite direction. That still leaves us with a very large area. We know that there is an area where a "piano key" molding consisting of arches that run vertical along the face of the molding and an additional 2" molding running along it somewhere but where?

We called the Architect Michael Roberts of Preservation Associates to come by and advise. After looking at the items in question he said that he felt that two runs of the factious molding was too much and makes the entablature to busy. He would like us to take pictures of the mockup with the two in place and one without the bottom in place and then start drawing several other options to fill in the remaining area. Then he can submit it to Lyman Labry with the Texas Historical commission to start discussions. I also stated that I would like Johnny Langer also involved because of his extensive knowledge of designs used in this period. The more eyes we can get looking at this problem the better.

It will be a long and sometimes contentious ordeal. People can be quite passionate about these types of issues but in reality you would not want anyone involved in this that was not passionate. It makes for a much better result even thou not everyone will agree on the ending design. And to be honest I love the discussions that are about to develop. I have a mentor a long time ago that I remember saying after a long heated discussion."Wow! Who would have thought people could be so passionate about whether a leaf bends right or left it is just a fricking leaf for God's sake!" But it does make a difference and when people look at the final design they will never really understand the painstaking effort it is to recreate it.

Thursday, October 8, 2009

Bead Run


Now we have run the base rail that the bead and reed sets on and we have cast the bead and reed elements that came from Matt2’s lathe work. Now all we need to do is install them in the rail taking care maintain.
After setting all the pieces we will paint the plaster using shellac . This will adhere the elements to the rail and seal the plaster. After that step then a little mold release and pour the rubber mold. If everything works as planed we will then have a mold to put in production to cast all the elements we need on sight.

Wednesday, October 7, 2009

"I can create this on the Lathe"


We are continuing to work on the missing elements in the entablature design that graces the top of the courtroom in Roberts County. There apparently was a piece that is what I call a bead and reed design. It runs eather at the top or bottom of the entablature. We know that it runs next to the factious leaf design that we put together because it was connected to the side of one of the larger pieces of that design. It is very full of paint and is very fragile so cleaning off the globs of paint would just destroy the only original piece of the element we have.

Matt, my son, came up with the ides of turning a new piece using a lathe. He set up the lathe and put two pieces of poplar wood together using double sided tape. Then he installed it into the lath and started slowing recreating the element using great care to exactly match the original piece. After carving out the design the then removed it from the lath and pulled the piece apart where it was stuck together this created two exactly matching pieces that were what we needed.

Ken and Dan in our shop also ran a run on the bench that represented the base of the element. They cut out a sheet of metal that matched the profile of the base of the original piece. Mounted it to a “Horse” and ren it along our run table slicing off the wet plaster until they were able to have a perfect base for our piece. They then hung it up to dry.

I poured a rubber mold of the bead and reed that Matt2 created. Ken in our shop will then cast me some pieces of the bead and reed and I will be able to put them together along the base and complete the model. I suspect that I will have all the elements to create the model be Thursday. I will cover the creation of the model when all the parts are ready to assemble.

Tuesday, October 6, 2009

Cutting out a Zizsaw Puzzel


Well today I worked on part of the entablature that goes around the courtroom in Roberts County. The part at the top of the picture is the part that we had put together using pieces we found in the box of pieces.(see” Hay look they fit together”r) We filled in the missing pieces using clay and then made a rubber mold. Then Ken in our shop started casting plaster pieces. I then cut pieces out of them and started piecing it together.

I drew some lines on the plywood base to represent where the balls or berries should be. This allows the correct placement of the pieces. As I cut out the pieces I’m having some trouble maintaining the correct curvature. The piece is not really round it is oval and the curvatures change. This has created a bit of trouble.

I will continue placing the pieces and will start filling in the cracks or joints and carving out the areas where I could not get the pieces to line up. It is tedious and in fact I think I could carve it out faster but this way it is more the original work and less my creation. In a few days I will have the model done.

Sunday, October 4, 2009

My Son in whom I'm well pleased.


We are still working on Harris County and thought I might give a little pat on the back to my son.

Last Monday when the film crew for the documentary was here they asked him a question and his response was beautiful. They asked him why he does the drawings? He stated

“Because someone has to do them, Dad certainly won’t”. And he is right. I hate drawing but my son has become quite good at it. I think in 3-D and trying to make a drawing reflect what I see in my mind is to frustrating. A fellow artist and good friend of my called me “carbon challenged” and he must be right.

But thankfully my Son Matt Henson II (or in our family lovingly known as Matt2) is quite good at it. (see photo above) He has had to submit all the drawings depicting the designs to the architect and the Historical Commission. Not only does he have to show the design he has to show how we are proposing how to mount them. It is long and tedious work and since the ending item is more of a sculpture he does not get the recognition he deserves.

He also is the director of Professio. Doing all the paperwork, billing, taxes, banking. All the crap I hate. And to be honest he is much better at it than I ever was. He is going to take this company a long way and I’m proud to be called his dad.

Friday, October 2, 2009

Hay look these pices fit togeather!


The courthouse in Roberts county was built in 1913 with plans drawn by Elmer George Withers an architect originally working in Stamford Texas a town fairly close by. There are no records of him attending any school of architecture so it supposed he learned his trade either thru correspondence or apprenticeship. He later set up a Fort Worth office and became rather successful. There is said to be a twin of this courthouse in Marion County however there is no ornamental plaster in that courthouse. It is a shame because it would have been a big help if it was a total twin. We could have copied the elements from that courthouse instead of having to piece together these scrip fragments and interject the design.

Jhonny Langer of Source Design Studio (http://www.sourcehistory.com/) did a paint survey earlier in the year to determine the paint scheme and he did some preliminary design work trying to determine what was the original plaster design. He is a great source of historical designs and I trust his input probably more than anyone I have ever worked with. However after looking closely at the pieces my Son and I found one piece that fit together with another piece. Then after looking some more searching again another piece then fit to another. After 8 hours of studying the plaster pieces we had 4 pieces that fit together and we began to formulate a different design.

We found evidence of paint drips that hung on the surface which after studying the locations of the drips and their orientation meant that this piece might have been at a totally different spot on the design. We took pictures and wrote a short disruption and sent them off to Jjonny and are waiting for his input. If he agrees that this might have been the orientation then we will proceed to redraw the layout of the design and submit it to the architect and the Texas Historical Commission with our explanation of why we thing the ornamentation is designed the way we think it was. This can be a very contentious issue and care will need to be taken to insure we are right before we submit. I hate it when someone comes up with something I overlooked that changes the whole thing. But that is why it is important to have a different professional people studying the issue.

This is going to me more interesting than I first expected. But this is something that both my son and I love. Just hope it doesn’t drag on and on until a decision on the design is established.

Thursday, October 1, 2009

Roberts County Courthouse


Professio by matt Henson Inc. has been contracted to perform the restoration of the plaster on the Roberts County Courthouse (http://www.co.roberts.tx.us/) in Miami Texas ( http://www.miamitexas.org ). The project manager is Grimes & Associates. (http://www.grimesengineering.com ) The project architect is Michel Peter with Preservation Associates (http://www.arch.ttu.edu/Architecture/Faculty/directory.asp?ID=38).

The ceiling in the courtroom had ornamental plaster on it. Unfortunately the courthouse sustained water damage and the plaster ceiling fell to the floor and along with it all the ornamental plaster. The pieces in the photo were sent to us to start the recreation of the ceiling. We have no good photos of the cornice work only these pieces which unfortunately do not show all aspects of the work. There will have to be some conjecture as to the continuation of the design.

I’ll keep you informed as to the progress of this interesting project.

Wednesday, September 30, 2009

Can you move a little to your right?


Monday the film crew from Communications (http://www.iocommunications.com) traveled up from Houston to our shop in Lubbock Texas. They came up to film the ongoing work on the Column Capital. I talked earlier about them filming the mold making process on site where we made rubber molds of the only remaining elements of these capitals. (see Lights Camera Action)

After making the rubber molds I shipped the molds to Lubbock and our shop started making the model. Matt Henson Jr. (my son) created a profile of the wall and the top of the capital. It is laying on its side so the wall surface is vertical and the part that juts out into the room is now horizontal. He also raised it up so I would not have to bend over too much. They then cast plaster in the rubber molds and installed them to the precise measurements that I provided on site.

So now we have a correct representative of what is left on site with a model at our shop. Now we can fill in the missing parts. We cut out templates and installed lathe to support the middle and start creating the shape of the capital. Now we will need to fill in the missing areas with clay and start carving out the design. The film crew wanted to capture this phase of the work and although we are just starting this process they could only come up now or wait another month. But in a month we will be almost totally done with the capital. So they decided to come up now.

They also set up an interview session asking my son and me about issues that are specific to this project and issues pertaining to historical restoration in general. It was a interesting and fun day.

Friday, May 1, 2009

Lights Camera, Action


Thursday I started making a mold of the left side of the major capitals that originally graced the four corners of the rotunda. This will give us a correct starting point for the recreation of the complete capitals. The center area is missing on all four capitals. By having a replica of both sides of the capital will give us a beginning. We are making a rubber mold of the original plaster surface and when complete we can then cast an exact replica of the original allowing us to set up each side on our work table in the shop in Lubbock without removing the original elements from the wall. It is a messy process spraying rubber on the surface. Especially since most of the capital is upside down.
The spray on rubber is a product of Smooth-on. It is a polyurethane rubber that comes in a kit designed to fit in their spray gun. Called easy spray 45. It has a mixing tube that correctly mixes the two components and sprays the prepared product on the surface. It sets up very fast so once you start you must continue without getting too thick and causing the rubber to run. It will take several coats to build up enough thickness and to fill in the undercuts. It however is very messy so I have taped up plastic around the edges and will wear protective clothing. This created a tough problem for some other professionals, the cameramen Jeffry Mills and Nash Baker.
They are producing a documentary on the restoration and wanted to film this part of the process. So they had to work around me 28 feet high up on the scaffold trying hard not to get the rubber on their expensive equipment and climbing all over the scaffolding trying to get the right angle to show the process. They even climbed up into the attic and shot out of a hole in the wall where an old ventilation duct used to be. They are true professionals and are passionate about their work.

Their company Io Communications is a documentary and corporate communications production company that specializes in historical and educational films. It is also involved in several broadcast documentaries for PBS through its nonprofit organization, Documentary Alliance org. Io is headquartered in Houston and was founded in 1983.

Io's involvement with the Harris County 1910 Courthouse restoration is to produce a one-hour documentary film and a coffee table book that documents and puts into historical context Harris County's restoration of this architectural gem in downtown Houston. Io was hired by Vaughn Construction who has had a long association with the country on construction projects and is this project's general contractor.

There team members include Jeffrey Mills, Producer/Director for the film and writer for the book, Barbara Mills, Animator for the film and Graphic Designer for the book, and Nash Baker (http://www.nashbaker.com) photographer for the book.

Tuesday, April 28, 2009

Harris Courthouse Pargework ceiling


Tuesday and Wednesday of last week I finely got to see how the lead paint removal was going. They had completed the removal on the sixth floor and Matt Bailey of Vaughn Construction had called a meeting with all concerned to discuss the issues at hand and to insure we were proceeding correctly. After viewing the area on the sixth floor I was relieved that extreme care had been taken and no damage to the plaster decorations was apparent. We discussed the edges of the paint where the loose paint was removed and the bonded paint was still adhered. On the ornamental plaster this did not seem to be a problem for me as only minor areas will require attention to repair but the flat wall plaster was going to have to require some additional work to make it look acceptable. The lead abatement contractor stated that the sealer he is using was white not clear. That created a problem as I needed to document the pattered ceiling that was left on the top floor. He gave me permission as long as I did not scrape on any substance and remove any paint.


This ceiling was not a part of the original construction originally the sixth floor was not finished out. It was finished out around 1915. The ceiling is a suspended flat plaster ceiling with plaster ornamentations installed to create an intricate ceiling. This type of ceiling called pargework or some times called Jacobean was very popular in the early 1900's. Ornamentation was installed directly to a flat ceiling to create a patterned panel look. This ceiling was outlined by a straight frame 6" away form the edge of the crown molding and then a alternating diamond and "cloverleaf" (My word as I don't know what the correct word for this design is) connected with straight runs of the same plaster molding. The ceiling extended along one side of the rotunda walkway approximately 40 feet long and 16 ft wide. However only an area approximately 12 by 16 is left and that area is severely deteriorated. (see Photo) The metal lath has rusted and is barely holding the weight of the plaster


I previously removed one complete diamond shape and ½ of the cloverleaf shape before any work was started because of my fear that these elements might be lost and they were the only elements available to recreate the ceiling. They came off almost too easily and it reassured me that that was the best procedure and any vibration would have caused these to fall to the ground and thus destroying the elements. You can see where the plaster ornamentation was installed by the white "ghosting" outline. The original elements were stuck to the ceiling using molding plaster or Plaster of Paris and then painted. So when they fell or was removed it leaves a clear definition of where they were installed. On one side there is still a portion of the original crown molding in place and you can see in some places its "ghosting line on the ceiling continuing around the outside of the ceiling. When the loose lead paint was removed you could also see the original layout lines that the original craftsmen used.


I stuck a clear Mylar sheet across the largest area of the ceiling keeping it square to the edge (see Photo). This allowed me to draw the outline of the ghosting and also draw the layout lines. After completing this I removed the Mylar sheet and stored it safely in a tube keeping it for use when the new ceiling in installed. I feel confident now I can correctly reinstall the ceiling and keeping the original layout as close as possible.


Pargwork ceiling sometimes called Jacobean


Tuesday, April 14, 2009

Harris County courthouse corbel


Here is the corbel we were directed by the architect to remove and use to make a mold from. I removed it from the wall and shipped it to our shop in Lubbock Texas.


They documented all the inconsistencies in the piece. I documented some of them here. They did a much more detailed documentation using square lines and every object was measured off of these square lines but that documentation photo did not transfer well into this format. The reason for this documentation is to inform all parties involved what they are going to receive after we make a mold of the piece. Every inconsistency will be a part of the new cast that we will reproduce. It is somewhat normal for there to be some inconsistencies and most people will never notice them. The rubber alone for the mold is expensive so we want everybody to understand what we are copying before we spend the money to make the mold.


After we get the go ahead for the architect we will proceed with the mold making process.


matt

Wednesday, April 8, 2009

Cook County Courthouse- continued study of designs for Harris county courthouse


I was able to spend time yesterday talking with Gordon Marchant with Komatsu Architecture of Fort Worth Texas. He is the architect for the restoration of this courthouse in Gainsville Texas. I was able to talk to him about the designs at the courthouse. He provided me some photos of the plaster ornamentation. You can access them here. Just to remind this courthouse was designed by the same architectural firm and designer that worked on the Harris County courthouse.


You can see again the influence of Louis Sullivan in the plaster designs. You can see also the similarities of the capitals and the way they integrate into the skylight. I have seen this skylight in person also and it is stunning. Makes me a little apprehensive about seeing the Harris skylight after it is completed.

Monday, April 6, 2009

Description & History of the 1910 Harris County Courthouse


The 1910 Harris County Courthouse is one of the most significant historical buildings in Houston and is considered by some as one of the most significant historic courthouses in Texas. It is a classical domed building designed by a Dallas firm Lang and Wetchel. The firm was owned by Otto H. Lang and Frank O. Wetchel. They also designed two other Texas courthouses one the Cook County Courthouse in Gainesville and the other the Johnson County Courthouse in Cleburne Texas. The firm was a large, prolific and well respected firm located in Dallas at the turn of the century.

Otto Lang was born in Germany and trained as a structural engineer. Frank Wetchel, born in South Wales and completed his apprenticeship at the architectural firm Sanguinet and Staats alongside another famous Texas Architect, J. Reiley Gordon. However these two men were destined to play a back roll to one of their employees; Charles Erwin Barglebaugh, who trained with Frank Lloyd Wright in Oak Park and was a graduate of the Chicago School of Architecture.

The Six story building located in downtown Houston at the square outlined by Fannin, Congress, San Jacinto and Preston streets is a massive stone building complete with colonnades on each side. But in my option its true beauty lies almost in ruins inside the building.

The building had a marble lined center rotunda open from the first floor to the top of the building with massive plaster column capitals at the top and a skylight in the center. Around the rotunda at each level is a walkway that had plaster crown moldings and capitals. Unfortunately in the 1950's it was remodeled and the center opening was filled in at each floor. The remodeling caused massive damage to the plaster elements at each floor and especially at the top of the rotunda.

Most of the plaster elements in the building have at least one good piece that can be used to make a mold and cast the missing elements. However the center capitals at the top of the rotunda have the center missing at each one. Photos were solicited from every possible venue and some of the original drawings are available. It is going to be a monumental task to recreate these capitals. But we here at Professio are all about challenges.

The project also benefits from the experience of a historical architect Susan with Architexas in Austin who has diligently worked for several years trying to correctly identify the elements and create drawings to show the supposed design. Architexas is the largest preservation architectural firm in the state of Texas. The project also has the benefit of another very large architectural firm of PGAL who brings a nationwide expertise of courthouse construction and restoration to the mix. All of who have spent endless hours diligently researching this wonderful building.

When you look at the plaster ornamentation you can immediately see the influence of Louis Sullivan. Sullivan was very influential in the Chicago School of Architecture and taught Frank Lloyd Wright and as thus on to Charles Erwin Barglebaugh. Sullivan's designs were used all over the world. They are very identifiable because they are so complex and symbolic. The Art Institute's 2007 exhibition of Sullivan's ornamental designs reads "The drawings on view in this exhibition provide a rare glimpse of Sullivan's interpretation of the philosophical principles of ornament and its relationship to architecture and the natural world. Through the use of ornament, Sullivan believed, the architect could establish an organic connection linking the practical and rational aspects of building design and demonstrating the underlying similarities between the simple geometries of science and the curvilinear configurations of nature.." His use of stretched objects and complicated geometric designs stand out even today. Because of the ornamental plaster and terra cotta shops located in Chicago his designs ultimately were used all over the world in buildings that he had nothing to do with.

This is the second job where I have had to study Sullivan's designs. I was commissioned to recreate the courtroom in Brownsville Texas where most of the elements were missing. Only an old fuzzy photograph from the archives at the University of Texas shows the missing capitals. The photo was in focus on the subject that was in the center of the room unfortunately the column capitals were along the sides of the room and not part of the field of focus. This courthouse was designed my Altee B.Ayress. Mr. Ayress had also hired a designer George Rodney Willis that had worked with Frank Lloyd Wright. All the remaining plaster elements showed the same Sullivanistic style.


We are set to start recreating the elements in the near future. Drawings are now in progress, Rubber molds are being made of some of the elements that were removed and Matt Henson Sr. is scheduled to start making molds of the remaining elements on site soon. We will try and keep those of you who are interested in the progress of this challenging project abreast of the developments and progress photos will be uploaded to this site for your enjoyment.

Sunday, April 5, 2009

Harris County Courthouse Photos


I have started a online photo album showing the Harris county courthouse. http://picasaweb.google.com/hensonplaster/HarrisCountyCourthouse?feat=directlink


It shows the existing conditions of the plaster elements. Of course there is only one photo or each different element each element is located all over each floor. So there is quite a bit of work ahead of us.